
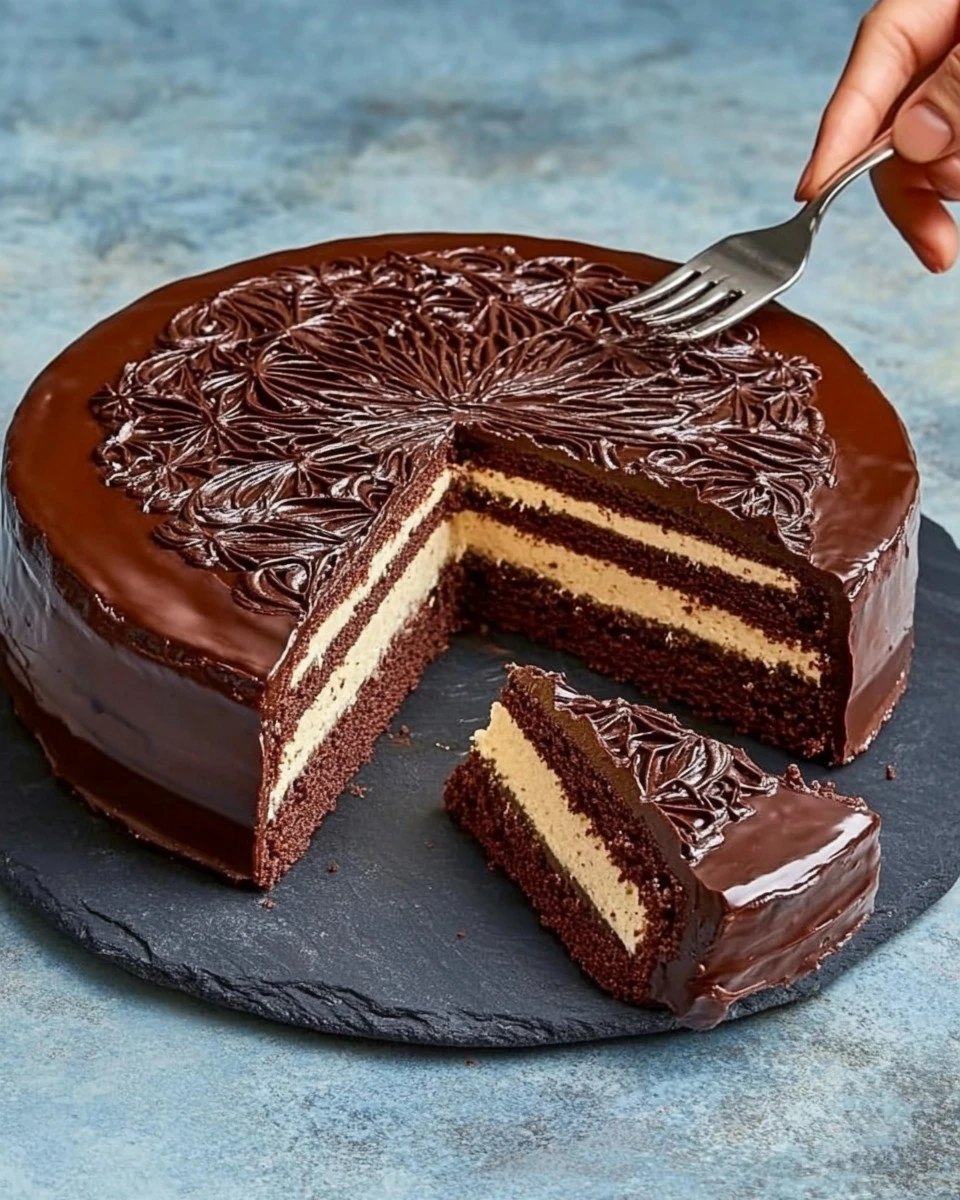
7 Steps to Create the Ultimate Layered Chocolate Dream Cake
If you’re looking to impress friends and family with a show-stopping dessert, the Layered Chocolate Dream Cake is the perfect choice. This delectable treat is rich, creamy, and sure to please the chocolate lovers in your life. With its delightful layers and silky chocolate glaze, it will undoubtedly become a favorite at every gathering. Let’s dive into the detailed recipe and learn how to make this delightful cake.
Ingredients You’ll Need
To get started, gather the following ingredients. You might already have many of them in your kitchen!
For the Biscuit Base:
- 4 eggs
- 180g sugar
- 100ml water
- 130g flour
- 1 tsp baking powder
- 2-3 tbsp cocoa powder
For the Cream Filling:
- 2 eggs
- 50g sugar
- 150ml condensed milk
- Vanilla extract (to taste)
- 3 tbsp starch
- 250ml milk
- 250g butter, softened
For the Impregnation Mixture:
- 150ml water
- 2 tbsp condensed milk
For the Chocolate Glaze:
- 3 tbsp cocoa powder
- 3 tbsp sugar
- 4 tbsp sour cream
- 50g butter
Step 1: Prepare the Biscuit Base
Start by preheating your oven to 180°C (350°F). In a mixing bowl, beat together 4 eggs and 180g of sugar until the mixture becomes light and fluffy. This step is crucial as it incorporates air, giving your cake a light texture.
Next, add 100ml of water and mix thoroughly. Sift in 130g of flour, 1 tsp of baking powder, and 2-3 tbsp of cocoa powder to the bowl, then fold the mixture gently until all the ingredients are well combined.
Pour the batter into a greased and floured cake pan and bake it in your preheated oven for approximately 25-30 minutes or until a toothpick inserted comes out clean. Once baked, let it cool completely before moving on to the next step.
Step 2: Create the Cream Filling
In a separate saucepan, whisk together 2 eggs, 50g sugar, 150ml condensed milk, and 3 tbsp starch. Gradually add 250ml of milk while stirring constantly to ensure a smooth mixture. Cook this mixture over medium heat until it thickens, then remove from heat and allow it to cool.
In another bowl, beat 250g of softened butter until creamy, then slowly incorporate the cooled milk mixture and a splash of vanilla extract. Beat until everything is smoothly combined.
Step 3: Assemble the Cake
Once your biscuit base is cool, carefully slice it horizontally into two equal layers. For the impregnation, mix together 150ml of water and 2 tbsp of condensed milk in a small bowl. Brush each layer generously with this mixture to keep it moist.
Now, begin layering! Spread the cream filling between the two cake layers and on top of the cake. Don’t be shy—use as much filling as you like!
Step 4: Make the Chocolate Glaze
For the final touch, prepare a rich chocolate glaze. Combine 3 tbsp of cocoa powder, 3 tbsp sugar, 4 tbsp sour cream, and 50g of butter in a saucepan. Heat on low until all ingredients meld together and become smooth and glossy.
Pour the chocolate glaze over the assembled cake, allowing it to cascade down the sides for an indulgent finishing touch.
Step 5: Chill and Serve
After glazing, refrigerate the cake for a few hours or overnight. This is key to letting all the flavors meld beautifully. When you’re ready to serve, slice the cake and enjoy a piece of chocolate heaven.
Why You Should Make This Cake
The Layered Chocolate Dream Cake is not only a feast for the eyes but also a delight for the taste buds. It’s perfect for special occasions, family gatherings, or just to treat yourself on the weekend. The layers of moist chocolate biscuit combined with a rich cream filling create an unforgettable dessert experience.
You can find more delightful recipes and tips on my website wifesrecipes.com.
If you love chocolate as much as I do, this cake will quickly become your go-to recipe. Whether you’re celebrating a milestone or simply enjoying a cozy evening at home, this cake is sure to bring smiles all around.
Conclusion
Baking the Layered Chocolate Dream Cake is a rewarding experience that will make your gatherings unforgettable. With its simple yet rich flavors, it’s a recipe you’ll want to make time and time again. So gather your ingredients and start baking today! Your taste buds will thank you.
For more delightful dessert ideas and cooking tips, don’t forget to check out wifesrecipes.com for endless inspiration! Happy baking!